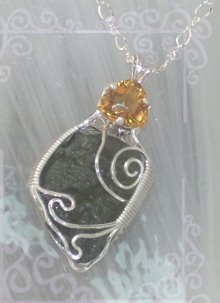
A New Tutorial!! Wire Wrapped Pendant, Beginner to Intermediate Wire Weaving Jewelry Project


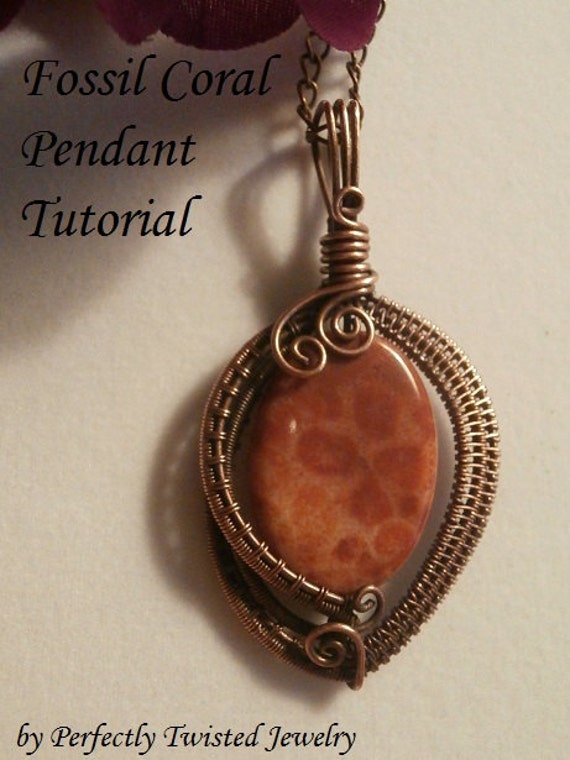
I've worked very hard all weekend to bring you the latest of my tutorials!  I think you'll love giving this project a try... it's a great pendant, designed with ease and versatility in mind!  I designed this in such a way that you can harness any size or shape of drilled focal bead.  The design ensures also, that the backside is 'clean', meaning you can, with some thought to design, create a reversible pendant and utilize both sides of a gorgeous stone.  The bail is secure, closed and large enough that you can enjoy your pendant on any size chain, decorative rope or ribbon.  Get creative and make a few for yourself, friends and loved ones! They'll adore your skill and love their beautiful handmade gift.


The tutorial bundle contains 3 files, the primary pendant project, a variations file, showing two additional designs using the same harness and a third file which will walk you through adding a lovely patina to the wire.

Click here to go directly to the listing

Enjoy the eye candy! And visit my store for more wonderful jewelry project tutorials!
https://www.etsy.com/shop/PerfectlyTwisted


click each image to enlarge and get a closer look!
 

Primary tutorial file:
18 pages
123 images
23 steps

Variations file:
10 pages
44 images
10 steps
Includes a 3rd pendant with 20 images to temp your imagination!

Patina Madness file:
3 pages
11 images
4 steps


Featured Artist, Deco-Artwork, Handmade Jewelry by Cindy Lodge

It's my pleasure to introduce you to my friend Cindy.  She is the owner and artist creator of Deco-Artwork Jewelry and I encourage you to visit her Etsy store!  The direct link is here...

https://www.etsy.com/shop/DecoArtworkJewelry

She specializes in vintage style necklaces, earrings and bracelets as well as wire wrapped and sculpted jewelry.  She is brilliant in combining quality gemstones and beads to create unique and beautifully designed pieces and welcomes your custom orders!  Enjoy a sample of her work below and visit her shop to see more of these delicious creations!  Click the item title to go directly to her store listing.

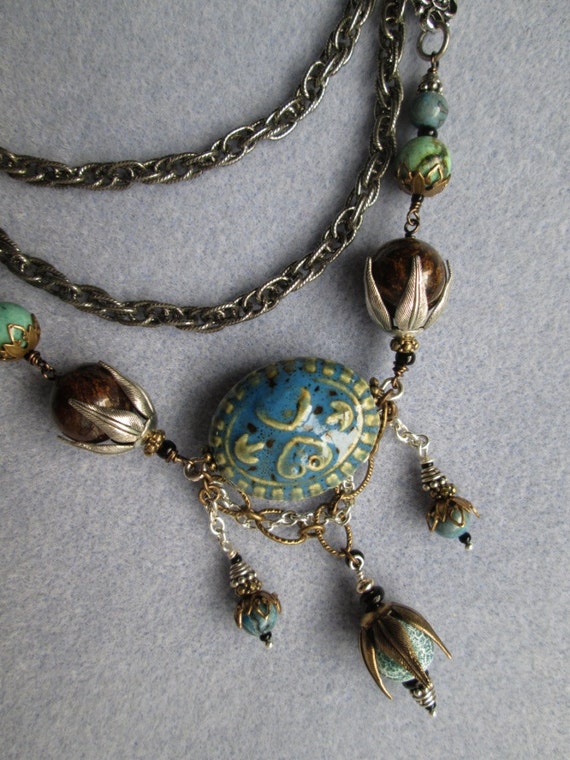
Triple Chain Necklace with Blue Green Beads and Vintage Ceramic Focal Bead, Mixed Metals 


  • Materials: Bronzite brown beads, Blue Laguna Lace Agate Beads, Green efluoresent agate bead, oxidized silver chain, oxidized brass chain, Antique brass lobster clasp, Large vintage ceramic bead, Vintage blue green and yellow oval bead, Rose leaf bead capps, Filigree bead caps, Black seed beads, Silver plated ball head pins, silver filled wire loops.


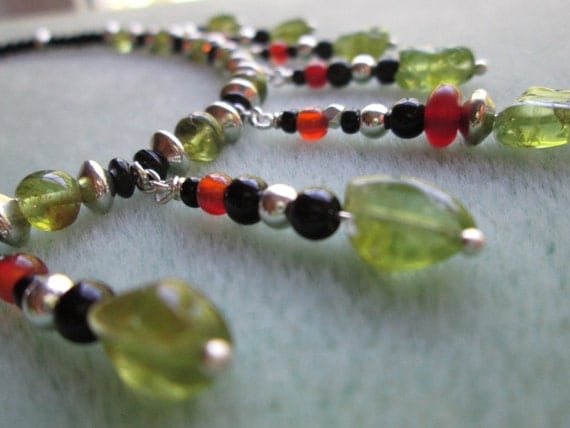
Necklace Fringed with Peridot, Onyx, Silver and Red Carnelian Pickapeppa


  • Materials: Peridot Nuggets, Peridot Round Beads, Black Onyx Beads, Silver Plated Beads, Red Carnelian Beads, Handmade Dangles, Handmade Fringes, 12 mm Oxidized Silver Clasp, Silver Plated Chain, Silver Plated French Wire


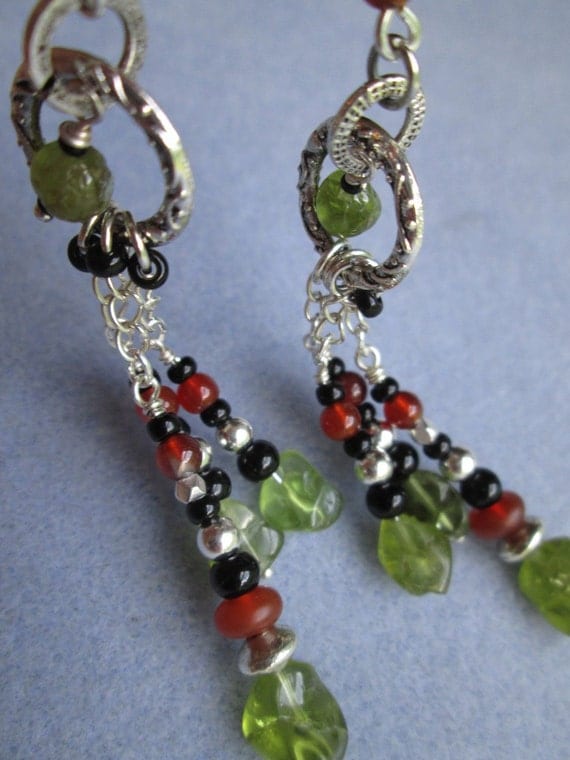
  • Materials: Sterling Silver Chain, Green Peridot Nuggets, Green Peridot, Beads, Black Onyx Beads, Shiny Silver Beads, Orange Red Carnelian Beads, Silver Plated Ball Headpins, Handmade Silver Filled Ear Wires, Beaded and Coiled Ear Wires, Jet Black Glass Seed Beads

A Custom Creation, Moldavite & Crystal Cluster, Wire Wrapped Reversible Pendant

A very wonderful soul gave me the opportunity to create a custom pendant for her.  I thought it would be fun to share the process with you.  These were very spirited stones and while I had a design in mind for them... they turned out to have their own mind about how they wanted to be in the wire!

I received these in the mail and as always, set them in front of me to determine which side would be the 'backside' of the pendant.  I turned them and turned them, looked at them in the light, trying to image my preconceived design around them.  Yet they lay there defiantly beautiful on ALL sides... and so after some time, I realized that I simply had to surrender to their energy instead.  I created a pendant that is reversible, showing off both sides of these beautiful pieces.

I'm very happy with it and happy to report that their owner is too!

Enjoy the images and please visit my Etsy store for more lovely creations.
https://www.etsy.com/shop/PerfectlyTwisted


I am always happy to do custom orders, so if you have special pieces you'd like in wire, I hope you'll consider to contact me.


Showing off some new jewelry!

I have to admit, I had a bit of 'jewelers block' for a couple of weeks and was a bit worried... but then it passed and I managed to get quite a few new pieces made!  I'm happy to show you some images and hope you'll visit the store when you get a chance.

I did a custom order for a very special ammonite two weeks ago and it caused me to fall in love with ammonites!  I purchased a few after that and have set a couple to wire.  The first in copper is an Opal Ammonite, very very pretty specimen with great flashes of color!  The other I set in rolled sterling silver and think it came out just wonderfully.

Enjoy the eye candy... they can all be found in my Etsy store.
https://www.etsy.com/shop/PerfectlyTwisted

Click each image to enlarge and get a better look!


New! Jewelry Tutorial, The Marvelous Marquise, Wire Wrapped Earring Pattern

Another little something I put together to challenge your wire desires :))

I’ve designed this pattern so that you can make both earrings AND a wonderful matching pendant from it. They are perfectly symmetrical so that you can simply go through the tutorial, step by step once, twice or three times, to make the earrings and/or the pendant! Additional instruction is included for the handmade ear wires and pendant bale.

There are 20 pages packed full of detailed instruction and over 130 close up images in 41 Steps. Estimated project time = 3 hours (earrings) an additional hour for a matching pendant.

A wonderful and challenging project for any level of wire artist.
Click the images to enlarge and get a closer look.
You can purchase this wonderful project at my Etsy store... click here to go there!
   

Supplies:
22 gauge, round wires (frame wires)
28 gauge, round wire (weaving wire)
Two, Marquise beads, 20mm long, 8 mm wide, side drilled
Six, 4mm, silver beads
Two, machine made earring hooks (optional)
20 gauge, round wires (handmade earring hooks and pendant bail, optional)

Tools:
Round nose pliers
Flat nose pliers
Wire cutters
Ruler
Grid paper (optional)

New Jewelry Tutorial! Heart of Diamonds, Advanced Wire Wrapped Earrings Project


Heart of Diamonds, what a deal! ;)

I designed this earring project in such a way that you can also use the same steps to make a matching pendant! This advanced wire tutorial contains over 120 clear, up close images and 22 pages of detailed instruction, in 41 Steps. A second digital file is included free, describing how to create your own earring hooks and necklace clasp. It also contains the pendant information including design variations.

This is a wonderful and challenging project for any level of wire artist. Learn the basics of wire weaving as well as a gorgeous symmetrical design. 

Click each of these images to enlarge for a better view.
Click here to visit my Etsy store and the tutorial listing


Estimated Project Time:2 - 3 hours

Supplies
Two, 10mm Briolette beads, side drilled
Four, 4mm Round silver beads
Two, standard earring hooks

Frame WiresSix, 22 gauge, round wire, cut 1 foot each
Weaving WiresTwo, 28 gauge, round wire, cut 4 feet each
Utility WiresFour, 28 gauge, round wire, cut 6 inches each

Tools:Wire cutters
Flat nose pliers
Round nose pliers
Ruler
Dowel (or a pen to bend earring hooks on)

Assumed Skills:Coiling
Using jewelry tools (pliers, cutters, etc)
Long wire management

New Jewelry Tutorial! The Galaxy Ring! DIY Wire Weaved Jewelry Project

Are you spiraling?  This is the newest addition to my wire wrapped jewelry tutorials and can be found in my Etsy store ... Click here to shop for it.

I've designed this ring to be clean on the inside, so it's 'scratch free' when wearing.  It makes for a wonderful and challenging project as well as a gorgeous gift for yourself or a special someone.  You will learn the basics of wire weaving a professional ring shank as well as this attractive wire sculpting design.  There are 36 detailed steps with over 100 large, clear images on each page, walking you through every twist and turn.  Have fun with this design and add it to your awesome list of wire jewelry skills!


Estimated Project Time: 2 - 3 hours Supplies: Three, 7 inch, 20 gauge wires (Frame wires) One, 5 feet, 26 gauge wire (Weaving wire) One, 8mm round bead. Tools: Wire cutters Round nose pliers Flat nose pliers Jewelry hammer Ruler Ring Mandrel

Managing Shipping Madness - For my beloved Etsy shop owner friends

It's hard work being an artist AND keeping a shop up.  I work all day, everyday on this little adventure of mine and have been very fortunate to have made some wonderful friends who've not only kept my spirits up, but have also been there with wonderful advice.  THANK YOU for that and I hope to share some of what I've learned here, to help other 'new' shop owners as well as spreading helpful information.

Managing shipping madness....

I sell handmade, wire wrap jewelry and in the beginning, it was mind boggling to tackle the issue of 'shipping' my precious items to their eagerly awaiting owners.  Here's what I find works best.

I use the United States Post Office, Priority Mail and here's why...

1.  They supply the shipping materials FREE.  There is a 'small' priority, flat rate box that you can pick up at any local post office (take a FEW home with you, they don't mind).
2.  It costs $5.80 to any US destination, up to 1 pound of weight.
3.  Tracking comes with that flat rate.
4.  They deliver in TWO business days... and they've never failed me yet.

So when I make a sale...

1.  I print the order form from the Etsy 'sold items' interface.
2.  I hand write the destination address onto the small flat rate box.
3.  I package my item(s) (in an attractive way) and include my business card and printed order form, for the customer.
4.  I go to the post office and purchase the $5.80 stamp, which comes with a tracking number.
5.  I return home and send the customer a shipping confirmation from the Etsy interface and include the tracking number for my customer.

For international sales, it works pretty much the same way, except the rate is certainly higher.

In my Etsy listings, I have only a quote for US destinations on shipping, however, I do make a note in each listing that the customer can contact me if they are located outside of the US.  If a potential customer expresses interest in an item and requests a shipping quote, it's easy enough to handle.

1.  Ask them for their shipping address.
2.  Go to USPS.com, use their Postage Price Calculator .. here's the link http://postcalc.usps.com/
3.  Select the Destination country.
4.  Scroll the 'sizes' until you see the 'box' or packaging you intend to ship with (I normally use their International Priority Mail packaging supplies)
5.  Once you click the packaging, it will tell you how much the cost of that shipping will be, along with how many days it will take before delivery.
6.  Convey this information to your customer and if they agree to the shipping, simply edit your item listing to 'ADD' their country as a shipping destination and include the shipping cost.

When you go to the post office, simply find that packaging material, fill out the shipping address and destination address, then fill out a 'customs' form.  It's a simple, small form and can be found near the shipping boxes.  Purchase your stamp and then go home happy :))

If in doubt, ASK the postal worker how to ship your package out of country, I find they are very helpful.

Certainly there are other ways to ship, printing your stamps from your printer, etc... and those work too, but for now, I'm 'old school' and directly hands on with each item any of my customers purchase.  I think 'simple' is the best way to do good business.

I hope this helps you tame the shipping madness!  Please feel free to comment or contact me with anything you'd like to share. :))

Happy SALES!

My Wire Jewelry Youtube Video

Yes, I broke down and decided to create a video to display some of my items!  You can find any of these listed at my Etsy store:  https://www.etsy.com/shop/PerfectlyTwisted  Click there and go shopping! :))
Thanks for watching.

The music is David Garrett, Rock Symphonies

Using a Butane Micro Torch to Create Copper Wire Headpins for Handmade Jewelry Part 2

As promised, here are a few picture examples of this process and how the wire should be positioned against the flame...

Please read Part 1 for 'the trick' and for safety considerations.

I've seen this process done with the flame pointed in the vertical position, upright and the wire held over the flame.  I don't  care for it as I've had that copper ball 'fall off' of the wire on a few occasions.. the concern obviously being that the molten copper will fall into the tip of your torch.  So I do this sideways, requiring that I turn the headpin once it melts, but I find it a much safer way, if you're new to melting wire.  Have fun!  Be safe!

Click each image to enlarge.


How to Create Balls on Copper Wire Ends Using a Butane Micro Torch aka How to Make Copper Headpins Part 1

I love the look of balled ends on wire and I've seen it in many places along the web, in silver wire.  I work mostly in copper, which is a harder metal, but I wanted to create this same effect... so a couple of weeks ago, I went to the local craft store and purchased a butane micro torch.  Copper melts at 1981 degree Fahrenheit, so if you're going to give this a try, make sure the torch you purchase will reach or exceed this temperature.

The exact torch I have can be purchased at Michael's for about $40 ... if you already have this one, it will work for sure.
http://www.michaels.com/Butane-Torch/bd1328,default,pd.html

You can purchase lighter butane almost anywhere... I get mine at the Walgreens.  You can also find it at Home Depot hardware stores.

My first try was a total misery and I wasn't able to get any gauge wire to ball up... including even a 20 gauge wire.  After some time and reading, I finally figured out the 'trick' to getting those lovely balls... and I've managed to ball up wire as thick as 12 gauge using this butane micro torch.

Here's how...

Before you begin
1.  Make sure you are working in a well ventilated area.  
2.  Use either a fire stone and/or a pan of water and work on a surface area that is not flammable.
3.  Use pliers that are safe to handle and long enough to keep your fingers away from the flame.
4.  Make sure your clothing and hair are pulled back and secure.
5.  Make sure your butane micro torch is completely full for best results.
6.  Use safety glasses if possible.

Grasp your wire length with the pliers, either in the center of the wire, or at the end opposite the one you intend to set the flame on.

The TRICK to this, is to get the tip of the wire and the tip of the flame, pointed head on, at each other.  If the flame and the wire are perpendicular when you start, the wire will get red hot, but the end will never melt and ball up.   

You will see the tip of the wire go red hot and the tip of the flame will become green... this is when the wire will begin to melt.  There may be small sparks at this point, so don't be alarmed and don't put your face too close to the heat.  

Once the wire end becomes molten, start to rotate the wire so that the balled end is pointed 'down', while you continue to hold the flame sideways and on the balled end.  At this point, the balled end and the flame ARE perpendicular.  This will create a nice rounded look to the molten ball.

Remove the flame from the wire while it's red hot and dip the whole wire, not just the end, into the pan of water to cool it down.

Keep in mind that your plier heads will be super hot also... so cool them down in the water too!

==============================