While this free project is a 'visual' about design... the tutorials within my store contain all the fine details, including material information, lengths and step by step instructions for each project. When visiting my store, please feel free to read my customer reviews!
Click each image to enlarge and get a close up. Enjoy!
Here, we're down to the last couple of wire lengths and while they can be simply finished off, it's more fun to use them for added design.
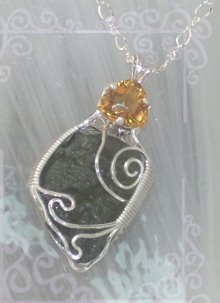
Sometimes, the work invested is 'on the back' but pays off by 'showing' along the sides or the front. In this case, I use the back wires to add substance to the sides and back of the pendant.
15


Taking time to manipulate wires into elegant curves will make a huge difference in your finished project.
If the curves are not elegant and contain small, out of balanced 'kinks'... use round nose pliers and a very light touch to smooth out the curves and remove the kinks.
I take a lot of pride in the fact that I don't use glue or solder to hold the stones in place. And I take huge pleasure in knowing that they won't ever just 'fall out' either. :))
This lovely pendant can be found in my Etsy jewelry store!
https://www.etsy.com/shop/PerfectlyTwisted
Please also visit my catalog of wire jewelry
tutorials by clicking here!
I hope you had fun, I hope this gave you some new ideas and fresh inspiration! Thanks for visiting and I'd love to hear your comments.
All designs and written information are copyright and can not be used to recreate a tutorial by any other party without written consent from me.


.JPG)
-002.JPG)


4 comments:
Yes, I love tutorial ideas that give options and are versatile. This is fantastic! The wire detail really make this a standout.
Hey thanks Andrea! I appreciate your comment and love that you're enjoying the tut! :))
My goal in life is to be half as good as you at wire jewelry making! Stunning work.
Such a sweet comment Tina, thank you!
Post a Comment