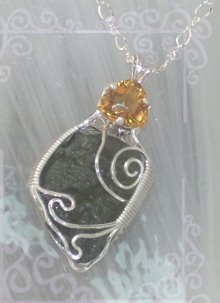
I love the look of balled ends on wire and I've seen it in many places along the web, in silver wire. I work mostly in copper, which is a harder metal, but I wanted to create this same effect... so a couple of weeks ago, I went to the local craft store and purchased a butane micro torch. Copper melts at 1981 degree Fahrenheit, so if you're going to give this a try, make sure the torch you purchase will reach or exceed this temperature.
The exact torch I have can be purchased at Michael's for about $40 ... if you already have this one, it will work for sure.
My first try was a total misery and I wasn't able to get any gauge wire to ball up... including even a 20 gauge wire. After some time and reading, I finally figured out the 'trick' to getting those lovely balls... and I've managed to ball up wire as thick as 12 gauge using this butane micro torch.
Here's how...
Before you begin
1. Make sure you are working in a well ventilated area.
2. Use either a fire stone and/or a pan of water and work on a surface area that is not flammable.
3. Use pliers that are safe to handle and long enough to keep your fingers away from the flame.
4. Make sure your clothing and hair are pulled back and secure.
5. Make sure your butane micro torch is completely full for best results.
6. Use safety glasses if possible.
Grasp your wire length with the pliers, either in the center of the wire, or at the end opposite the one you intend to set the flame on.
The TRICK to this, is to get the tip of the wire and the tip of the flame, pointed head on, at each other. If the flame and the wire are perpendicular when you start, the wire will get red hot, but the end will never melt and ball up.
You will see the tip of the wire go red hot and the tip of the flame will become green... this is when the wire will begin to melt. There may be small sparks at this point, so don't be alarmed and don't put your face too close to the heat.
Once the wire end becomes molten, start to rotate the wire so that the balled end is pointed 'down', while you continue to hold the flame sideways and on the balled end. At this point, the balled end and the flame ARE perpendicular. This will create a nice rounded look to the molten ball.
Remove the flame from the wire while it's red hot and dip the whole wire, not just the end, into the pan of water to cool it down.
Keep in mind that your plier heads will be super hot also... so cool them down in the water too!
==============================


.JPG)
-002.JPG)


