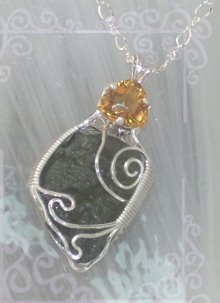
Heart of Diamonds, what a deal! ;)
I designed this earring project in such a way that you can also use the same steps to make a matching pendant! This advanced wire tutorial contains over 120 clear, up close images and 22 pages of detailed instruction, in 41 Steps. A second digital file is included free, describing how to create your own earring hooks and necklace clasp. It also contains the pendant information including design variations.
This is a wonderful and challenging project for any level of wire artist. Learn the basics of wire weaving as well as a gorgeous symmetrical design.
Click each of these images to enlarge for a better view.
Click here to visit my Etsy store and the tutorial listing
Estimated Project Time:2 - 3 hours
Supplies
Two, 10mm Briolette beads, side drilled
Four, 4mm Round silver beads
Two, standard earring hooks
Frame WiresSix, 22 gauge, round wire, cut 1 foot each
Weaving WiresTwo, 28 gauge, round wire, cut 4 feet each
Utility WiresFour, 28 gauge, round wire, cut 6 inches each
Tools:Wire cutters
Flat nose pliers
Round nose pliers
Ruler
Dowel (or a pen to bend earring hooks on)
Assumed Skills:Coiling
Using jewelry tools (pliers, cutters, etc)
Long wire management
New Jewelry Tutorial! The Galaxy Ring! DIY Wire Weaved Jewelry Project
Are you spiraling? This is the newest addition to my wire wrapped jewelry tutorials and can be found in my Etsy store ... Click here to shop for it.
I've designed this ring to be clean on the inside, so it's 'scratch free' when wearing. It makes for a wonderful and challenging project as well as a gorgeous gift for yourself or a special someone. You will learn the basics of wire weaving a professional ring shank as well as this attractive wire sculpting design. There are 36 detailed steps with over 100 large, clear images on each page, walking you through every twist and turn. Have fun with this design and add it to your awesome list of wire jewelry skills!
Estimated Project Time: 2 - 3 hours Supplies: Three, 7 inch, 20 gauge wires (Frame wires) One, 5 feet, 26 gauge wire (Weaving wire) One, 8mm round bead. Tools: Wire cutters Round nose pliers Flat nose pliers Jewelry hammer Ruler Ring Mandrel
Managing Shipping Madness - For my beloved Etsy shop owner friends
It's hard work being an artist AND keeping a shop up. I work all day, everyday on this little adventure of mine and have been very fortunate to have made some wonderful friends who've not only kept my spirits up, but have also been there with wonderful advice. THANK YOU for that and I hope to share some of what I've learned here, to help other 'new' shop owners as well as spreading helpful information.
Managing shipping madness....
I sell handmade, wire wrap jewelry and in the beginning, it was mind boggling to tackle the issue of 'shipping' my precious items to their eagerly awaiting owners. Here's what I find works best.
I use the United States Post Office, Priority Mail and here's why...
1. They supply the shipping materials FREE. There is a 'small' priority, flat rate box that you can pick up at any local post office (take a FEW home with you, they don't mind).
2. It costs $5.80 to any US destination, up to 1 pound of weight.
3. Tracking comes with that flat rate.
4. They deliver in TWO business days... and they've never failed me yet.
So when I make a sale...
1. I print the order form from the Etsy 'sold items' interface.
2. I hand write the destination address onto the small flat rate box.
3. I package my item(s) (in an attractive way) and include my business card and printed order form, for the customer.
4. I go to the post office and purchase the $5.80 stamp, which comes with a tracking number.
5. I return home and send the customer a shipping confirmation from the Etsy interface and include the tracking number for my customer.
For international sales, it works pretty much the same way, except the rate is certainly higher.
In my Etsy listings, I have only a quote for US destinations on shipping, however, I do make a note in each listing that the customer can contact me if they are located outside of the US. If a potential customer expresses interest in an item and requests a shipping quote, it's easy enough to handle.
1. Ask them for their shipping address.
2. Go to USPS.com, use their Postage Price Calculator .. here's the link http://postcalc.usps.com/
3. Select the Destination country.
4. Scroll the 'sizes' until you see the 'box' or packaging you intend to ship with (I normally use their International Priority Mail packaging supplies)
5. Once you click the packaging, it will tell you how much the cost of that shipping will be, along with how many days it will take before delivery.
6. Convey this information to your customer and if they agree to the shipping, simply edit your item listing to 'ADD' their country as a shipping destination and include the shipping cost.
When you go to the post office, simply find that packaging material, fill out the shipping address and destination address, then fill out a 'customs' form. It's a simple, small form and can be found near the shipping boxes. Purchase your stamp and then go home happy :))
If in doubt, ASK the postal worker how to ship your package out of country, I find they are very helpful.
Certainly there are other ways to ship, printing your stamps from your printer, etc... and those work too, but for now, I'm 'old school' and directly hands on with each item any of my customers purchase. I think 'simple' is the best way to do good business.
I hope this helps you tame the shipping madness! Please feel free to comment or contact me with anything you'd like to share. :))
Happy SALES!
Subscribe to:
Posts (Atom)