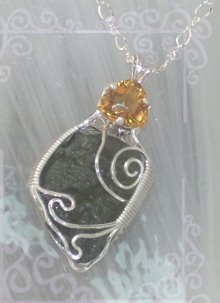
Copper and Sterling Silver Wire Wrapped Jewelry In the Making...


Well good morning again everyone! There's fresh coffee, tea, sugars and honey on the table. ;)

I've been head down this week working on a few things. One of them being learning about copper. I'll have a good article posted with links to a few sites and some information I found soon. I'm 'composing' while I create and learn. For now, I wanted to share some images of a couple new copper projects in the works. I have yet to finish earrings and such for these sets but by this weekend, they should be posted.

I find that copper is amazing with turquoise and finally, I have found a way to use the wonderful beads I purchased last year at Magpie Gemstones. The little focal 'Goddess face' there is porcelain and I also purchased this from Magpie. I'm afraid I don't remember the designers name, but I purchased three of these focals from Szarka last year and just love them. I'm glad I found copper to use with them. Check out her beads - amazing quality and the price was outstanding. I have to admit that I've used turquoise before, but didn't 'love it' until I got these strands. I also have some of her focal bone pieces which are outstanding and have waited to find the right application for them. I think copper is going to be perfect and those images are also, coming soon.

Thanks to Magpie! http://www.magpiegemstones.com/home.html
These images are sold but I hope they give you some great ideas. The bone beads, turquoise and porcelain focals are from Magpie. The first image below to the left... those beads are called Pietersite and they're an amazing blend of browns, tans and red colors. I think they all worked very well in copper. :) Enjoy!


These are some additional things in the works... just so you know I'm still here. :)

(the aqua aura pendant is listed. Click image to go there)


Okay everyone - back soon - many hugs!

Thanks for visiting Perfectly Twisted Jewelry! Please contact me with comments or questions!
IzzyzGumbo@gmail.com
twitter.com/izzygumbo

Mystery Beads.... and Copper


I love the look of these beads with the copper and leather. My family brought them back from Mexico last year for me, but unfortunately, we've misplaced the name of the beads! They almost seem as though they are a clay of some type because the drill hole seems like a chalk or hardened clay, but... we were told they are stones of some kind. If you have any idea what these might be, I'd really appreciate the information. I've been searching for a while, but haven't found anything even close.

I hammered these copper pieces and then used a mixed color of copper to accent the metal. The necklace is meant to be worn close to the neck like a choker. I think, having chatted with some of you now on this, I might call them Artistic Beads if I can't identify them as a natural stone. They are just beautiful and I hope the images do them some justice.

Again - any further help with the beads would be great, if you recognize them!
Many hugs.

Thanks for visiting Perfectly Twisted Jewelry! Please contact me with comments or questions!
IzzyzGumbo@gmail.com

Simple Hammered Copper Wire Jewelry Sets

I spent a few days in thought with myself. Trying to find some simplicity in a time of confusion and change. As much as I love the rocks and beads... it was all just a bit too much for these days and so I found myself with copper. Just a simple spool of natural wire, a hammer and some brown leather cord. The rhythm of the hammer and the curve of the spirals took me away to a very quiet place. I found some clarity and I found some strength. These pieces almost made themselves as they helped me clear my mind. It's very hard in a time of change to remember and recognize that we ourselves, choose these changes. We are the energy behind the motion of our Universe and many times, we're not even aware of it. We wonder 'what happened' to us, when it fact, we acted upon our need and desire for change in our lives. We are the energy behind the motion of our Universe and I realized that I Create, my reality....

These pieces were comforting. Blessings and much love my friends.

Simple Copper Collection


Welcome new wire workers. Sometimes we find excitement in the jewelry we create with our hands and sometimes, we create to find peace. For me, clarity and peace were the inspiration for these pieces. A mind returning to the simple nature of Universe, the simple nature of 'Self'. I know it sounds funny to think hammering would bring peace of mind, but it did. :) Maybe not for my neighbors, but for me, I began to not even hear it... ha!

The designs here are simple, but this wire is thick (16 gauge) and it's not that easy to work with. Not difficult, but expect to need muscle for it. There was substantial bending and hammering just to get them to the desired look. The small loops are most difficult to make tight with this size wire, even if it be 'soft' wire. Take care when gripping the wires with your round nose pliers, hold onto them firmly and with strength, use the build of the pliers to bend that loop. For further loops in the spiral, a tip is now to move to flat nose pliers. Insert them into the small tight loop, grip firmly but careful to minimize scratching and work with both hands, to control the spiraling. Hold the loose ends of the wire close to the spiral loop and pliers, this will help you roll the bends. Remember to release and reposition your pliers to keep the looping controlled and so that you don't contort yourself.

Once you have your shape, use a flat head hammer and pound the wire evenly on both sides until you get the desired look for your pieces. You will need an anvil or a metal steel block to rest the wire against while hammering. Keep in mind that while you hammer, some loops will loosen and the wire will 'flatten' out slowly. Remember to use your flat nose pliers and keep the shape while hammering. You will find that the wire will also begin to harden the more you work it with the hammer and the 'shine' in the copper will begin to become slightly matte in finish. You might keep rubber coated pliers near, however I find them to slip. Using the metal pliers to hold the wire is the most secure for me, but again, risks scratching. Some buffing might be needed to finish your pieces. Enjoy and I hope this gives you some great ideas for the week. These items are new in my shop! Thanks for visiting.

Thanks for visiting Perfectly Twisted Jewelry! Please contact me with comments or questions!
IzzyzGumbo@gmail.com

Featured Artist! ChezChani


ChezChani
is a wonderful shop full of bright, beautiful and unique designs. Roz and Elayne, a mother daughter team, create stunning works of glass, wire and finely beaded jewelry. They reside in the fabulous city of Las Vegas NV and reflect the fun and adventurous nature of that city in some of their jewelry designs. I absolutely love the playing card earrings and the Peyote stitch is mesmerizing in this black and white patterned bracelet.

Visit them and their outstanding art! Click any of the images to visit.


Thanks for visiting Perfectly Twisted Jewelry! Please contact me with comments or questions!
IzzyzGumbo@gmail.com

What Is Wire Wrapped and Beaded Jewelry?

~PerfectlyTwisted Jewelry

The art of making jewelry using stones and natural materials from the earth, spans back thousands of years. Wire wrapping is one of the oldest techniques used to create jewelry and can be dated back to the years of BC. Samples from the Sumerian Dynasty and Ancient Rome show that they were using wired loops and wire techniques over 2000 years ago. The ancient Egyptian goldsmiths were credited as the first craftspeople to produce jewelry entirely from wire approximately 4000 years ago. The Vikings were knitting their wire into jewelry and making chains of metal wire.

The technique of wire wrapping specifically, normally does not include the use of soldering or adhesives to keep the stones in place or the wires together. The design in the wire and the placement of the stones within that, are the art of securing the stones in place to create a beautiful piece of unique jewelry. Patterns joining round ‘links’ or beads create unique and intricate designs that can sometimes even resemble or function as ‘fabric’. Chainmaille is one such example of this, in its most complex forms. Stitching with beads is another and sometimes known as 'seed beading'.

With no alteration to the ‘nature’ and only the application of imagination, are these amazing works created. The art is appreciated not only for it’s beauty but also because by way of it’s creation, it can only be done by hand. Machines can produce casts and presses to replicate jewelry designs for mass market. Machines can not however, create the intricate wire weaved designs found in wire wrapped jewelry and other fine wire art. This takes the hand of skilled Artisans and Crafts people.

When creating wire jewelry, all forms of drilled beads, loose rough rocks, polished cabochons, crystals and gemstones can be used. This includes other natural beads such as seeds, shells, wood, paper, blown glass and clay of various kinds. Corals, fossils, meteorites and synthetic stones included. This is part of what makes this art limitless. Many artists mix metals, wire sizes and types. Some include sheet metal designs, precious metal clay elements and even fabric.

Wire doesn’t stop at jewelry however. Many artists extend their designs into the home, beading lampshades, pillows, creating wire elements for the dinning table such as beaded napkin holders, candles sticks and wine glass markers. Drink stir sticks and hair decorations are other fun projects!

Not to mention… all of this as applied to weddings and other special occasion.

There is a magical peace and joy that come with this art. To sit quietly with Earth’s elements, your imagination, your hands, some simple tools… and to challenge your mind into bringing those things together as an expression of yourself is something… almost indescribable.

I hope this inspires you when you shop for gifts, when you sit to create for your family or loved ones and when you consider ‘what to do next’ to creatively express yourself.

~Please see the links on my side bar to visit some outstanding artists and their creations! Thank you for visiting me also. :)

Blessings and Peace.

Click the images to visit each amazing artist. Visit the links on my side bar too! Many artists, sharing, caring, learning, creating and exploring. :) Welcome!

eSMArt Team Store


Thanks for visiting Perfectly Twisted Jewelry! Please contact me with comments or questions!
IzzyzGumbo@gmail.com

Reversible Carnelian and Copper Wire Wrapped Donut Pendant TUTORIAL

Updated: 02.09.2009 Happy Full Moon by the way...
The tutorial is now up! Please shop me. ;D
http://perfectlytwisted.etsy.com


I hope this post finds everyone having delightful days :)

A favorite stone shape to work with is 'donut'... gotta love them for breakfast and they work great for wire also! I've just listed these three Carnelian pendants in my Etsy shop so please be tempted! :)

Made with one continuous three foot, craft copper wire, cutters, flat nose and round nose pliers. The copper wire is a fun look against the color of Carnelian stone and I think I'm quite happy with how these turned out. I hope it gives you some good ideas! All three of these designs are basically the same harness and bale. :)

I can see maybe adding some smaller wire and beads if I wanted to create more elaborate designs with this wrap style. The style of the wrap allows for the pendant to be worn on either side so the design possibilities are great and a reversible pendant is always fun to offer your customers!


Thanks for visiting Perfectly Twisted Jewelry! Please contact me with comments or questions!
IzzyzGumbo@gmail.com

Coffee?


I was saving this for today, but I'll deposit the image here with links and let you explore instead. I'll write on Selenite another day. ;) I'm having a bit of trouble taking an image of mine anyway, but you can check THESE out. Mine's not as biggie. ;) But mine 'does hold it's own'... they're just tricky to get image on... The surface of mine, I want to capture as close up as I can because the texture is very similar (at least to me) of looking at a circuit board... You'll see if I can ever learn to get a decent picture. How does one take photos of something that is similar to icecubes???
Back soon. xo


~Talk about Superman and his Fortress of Solitude!
~There is a 'Queens Chamber' named in this cave I believe (I'll have to review)... but,
I say this is WonderWoman's Fortress of Selenite then!
~It's about time we got 'ours'. ;) wink-et-blink... as I roll off my chair in giggles!

http://www.mineraltown.com/Reports/giant_crystals/giant_selenite_crystals.php
http://www.minsocam.org/MSA/collectors_corner/arc/naicagyp.htm

Giant Selenite crystals in the Naica mine, Mexico... and yeah, that's a 'human' right there standing on that crystal.
*click to close up

And Remember....
A Pyramid...

Has 5 'faces' and the 'bottom' or 'foundation' is always the EARTH.

~And from there, we grow again~

~we play to know again...
nous jouons pour savoir encore

~Via the Nature and then...
μέσω της φύσης και έπειτα

...jugamos y seamos amigo….again.

echo...

~we are friend.
we.meme

About Apatite and Zincite Crystals and Gemstones


Well, as promised, I've found some time to return to the new pendants and share something about their crystals. I think you'll enjoy the information and I thank the sources for their information. Please visit my etsy if I temp you! ;)

UPdated... these pendants have both been sold...


Meet.... Apatite and Zincite:

Perhaps this doesn't look like a Koi to you, but I assure you She is... all 'coi'. ;)

Sterling silver wire and beads surround the most amazing Neon Apatite and Zincite crystals! Intricate wire details and design make this a truly one of kind piece. The frame is 18g sterling silver wire with 24g and smaller in accents. A mix of 1mm and larger sterling silver beads are woven in and surround two Neon Apatite rough gemstones. They're stunning in color and AAA quality. A small but outstanding crystal of rare Zincite is tucked in along with a couple of peacock blue freshwater pearls.

Koi: Koi, or Carp, are a fixture of Japanese culture and art and play important roles in both Chinese and Japanese myths, legends, fables and stories. In many of those stories, Koi are transformed through their efforts and perseverance, able to climb waterfalls or become dragons. The Koi fish represents perseverance in the face of adversity and strength of character or purpose. The Carp also represents wisdom, knowledge, longevity, and loyalty.

The 'story' of Apatite:
The name is derived from the Greek apatao, meaning "I am mistaken," because for a long time, it was confused with other stones. It is often confused with Aquamarine and Beryl which are both harder then Apatite. Apatite was not yet known in ancient mythology, it's often fascinating strong blue color only became famous in modern times. It also exists in white, yellow, green and orange. Apatite is said to encourage intuition during meditation and can stimulate memories of the past. When placed on the throat chakra, apatite produces a feeling of warmth and harmony and helps in overcoming problems.
~Healing Crystals and Gemstones From Amethyst to Zircon
ISBN 1-56852-442-0


Apatite is associated to Aquarius.
It belongs to the family of phosphate minerals.
Hardness 5
Found in Sri Lanka, Burma, India, Canada, Mexico, Brazil

I chose these gemstone for this Koi because of all the symbolism involved. "I am mistaken" ... one does not have to be 'hard' at heart, harsh in voice or tough in thought and action to create transformation and change. A 'new' form of individual thought patterns can create a better world, full of hope, harmony and wisdom. I chose Zincite to accompany the Apatite because it requires 'the fusion of man made and Natural' efforts to exist. Rare when such a unity can come together in the creation of such beauty.

Our human efforts to exist within ourselves, within our technologies, moving forward in personal evolution, while still honoring our past... in itself, is a rare blend of our being. We are each a 'drop in the sea'... and yet the sea can not exist without 'us'. We are humbled in Nature and yet Nature can not be 'grand' without 'us'. We are as rare, miraculous and special as any of the gemstones I use in Creation.
And as glorious science would tell us... we ARE, the gemstone.

~So enjoy Ourselves, as a Magical Koi~
~Slip away... between the the mesh~
~A fusion of life, endeared to the chest~

I thank the sources for the shared information and encourage your visit to their sites for further learning about these rare crystals...

The story of Zincite:
Borrowed from http://www.towercrystals.com/zincite/index.html

Zincite crystals of this caliber only come from the Zinc smelters of Poland. Red Zincite Crystals are the most sought and are getting very scarce. The naturally occurring conditions necessary to grow these crystals were created inside of zinc smelters so they are a fusion of natural and man made. Zincite crystals are no longer being produced due to changes in the smelting process. Some of the green and blue specimens actually will fluoresce under a black light.

Borrowed from: http://www.man.li/zincite.htm
Zincite can activate the lower chakra. This mineral provides help for synthesis of personal power, creativity and physical energies. Since our Zincite Crystals crystallised from the gaseous (fire) state directly to the solid state without ever becoming a liquid (unlike 99,9% of all other minerals which have been at some stage liquids in their thermal history). Since fire is the cognition of the transformation of the hard-physical to the hard spiritual, red Zincite getting big importance in our time of collective transformation into the cosmic Aquarian age .

The metaphor of a zincite crystal is that out of all the tragic, all the devastation and trauma something beautiful, valuable and desirable emerges! All that occurs follows a way and what happens follows a higher goal.

~ This piece of rare zincite is 'falling through' the 'Meme'brain'... and I won't explain why I named it what I did..., just know that it's all about creating new Uni-Verses. ;) Sharing ourselves in new ways with new patterns for growth, prosperity and social interactions. Best of all... it's all about the culmination of the human spirit into the 'greatest time' that human-kind will ever engage. We are re-discovering ourSelves....

Thanks for visiting Perfectly Twisted Jewelry!
Please contact me with comments or questions!
IzzyzGumbo@gmail.com

Tutorial Beginner: How To Create a Twisted Wire For Wire-Wrapping Jewelry, Using a Pin Vice

Most wire wrapping projects use either square or round wire. There are many techniques which can be applied to the wire before the wrapping process. One of them is to add a 'twisted' or filigree look to square wire. This is a short, free tutorial on how to create a twisted wire to use for your wire wrapping projects. Click on any of the images for a closeup view of the tools and wire used.


There are a few ways to create a twisted look to square wire. The old fashion way is shown here and best used for 'smaller' projects. If you are twisting a foot or two of wire, this method is good to use, but if you are twisting many many feet of wire, then an alternative would be to use a drill head or similar type tool. In this tutorial, we are using a Pin Vice and flat nose pliers.

The pin vice I'm using is two sided and each 'bit' is designed for certain gauge wires. The most common gauges for wire wrapping jewelry are 21 or 22 gauge, dead soft wire, either square or round and 'half' round banding wire. The pin vice I have will work with most wire from 24g to a larger 18 gauge wire. If you are purchasing a Pin Vice or Pin Vice set, make sure that you get the tool appropriate for the gauges you work with.

1. To create a twisted look, you are best to begin with square wire. I normally use what's called Dead Soft wire. It's easier to work with when wire sculpting or wrapping then 'hard wire' is.
Twisting the wire will create more strength in the wire also.

2. The 'tools' used are flat head pliers and a wire twisting tool called a Pin Vice. As shown in the image, the wire slips through the pin vice and is held in place by screwing the head 'closed' around the wire. Working with 2 or three inches at a time is best.

3. Use your pliers, clamp down and hold the 'end of the wire. Holding the vice with your other hand, begin to manually turn the tool either toward you or away from you. Keep the twisting as consistent as you can. Count them per the 2 or three inches you are working with. The more you twist, the tighter the look.

4. After you have the desired 'look' for 2 or 3 inches, stop, loosen the vice, slide it back along the square wire, exposing another 2 or 3 inches of untwisted wire. Tighten the vice and move the teeth of your flat nose pliers to hold the wire now, at the intersection of the previously twisted wire section and the section to be twisted. Begin the manual twisting process again.

5. Continue these steps until all the wire length is twisted. You will notice that the new wire has much more strength to it then the previously untwisted wire. This technique adds a great look to wire projects but is also great to use when building bails. If your project is small and you are using thin, soft wire and need to add strength to the bail, the twisting method works quite well.

Pin Vices are not that expensive and can be found at most jewelry supply shops. I think I remember purchasing mine from Wire-Sculptor.com for less then $15.00

In one of the tutorial videos I've studied in the past, I also saw a technique where twisting could be done with an electric hand drill and pliers. The same concept applies. Make sure you hold onto the loose end of the wire tightly in your pliers, using a small hand drill as the 'vice', clamp down on the end of the wire and close the bit around it. Then turn the drill 'on' or using a finger trigger, begin the drill head on 'slow'. It will start to twist your wire at a pretty decent speed.

Enjoy! I hope this helps you get started with Twisting Wire.

New Beaded and Wire Wrapped Earrings

Okay, I TOLD you I did something more than eat this holiday weekend right??? ;) Click to enlarge any of the images and excuse my poor photography.. I try.

These are a pair of beautiful Chalcedony drops which I strung up with oodles of Iolite chips and silver 1mm beads for some sparkle. They hang just about 2 inches long from the top of the earring hooks to the bottom of the beads. These and all of the new items below, are listed in my Etsy shop now, so please... DO SHOP! :)

These are fun for the holidays which I might be getting into the mood for. Normally, if you can believe...
I'm a 'Bahumbug'. Yes, true. ;)


My fave stones and some of the last that I have. These are some luscious Larimar drops in sterling silver. Hard to see in this image, but the stones are a bit 'deeper' then they appear here. There are four bands of 21g square wire around each of them. One secures the back, two wrap the sides and the first band secures the front of the stone. I'm not sure if I mentioned this for those new to wire, but ... many of us, I'd bet to say even most, secure the stones without adhesives. This is what makes them so wonderful to be hand made. The wire is the only thing holding them in place. To wrap a secure stone and make it attractive to show off the stone is always part of the goal for me. I've only been doing wire wrapped jewelry for the past couple of years off and on. I'm ready to get back into the groove of it and continue my learning. I added a link to JewelryLessons.com which I encourage you to check out! There are many wonderful, affordable tutorials there along with oodles of free tutorials provided by many wonderful artists. I hope to get my tutorial writing skills along with my wire techniques up to snuff enough to contribute there sometime soon. Meantime, mosey over and have a look. OH WAIT, go to my Etsy listing and shop for these amazing earrings first! lol! ;)


Amber's Twist...
Have I ever told you about liquid band aids? The best dang thing you will EVER discover if not. Wire people need this.. it's in the 'ouchy' section of the grocery store. Get the store brand it works just as well as the 'cost more' brand. I know this to be true. :)

Great for when you're a crazy wire worker and even when the fingers are poked, you continue...

Die hards we are!


This took hours and hours of loving care... most of these dangle bracelets do but they are so worth the time. I love the way they feel, the beads hanging in such a beautiful cluster at the wrist! I did the wire spirals myself which added all kinds of time to this, but... such as the pleasure of things. The spiral frames are done with hammered 18g sterling wire and then coiled in 26g sterling also. The beads are 1mm sterling silver and there are a mix of bali dangles and a Swarovski clasp. This Baltic Amber has a wonderful 'cognac' color which I think blends quite well with silver. It's a very 'rich' look in my opinion, warm and natural.
I love it.

And then here's something cool about Amber....


Wiki:
As reported by the Ancient Greek philosopher Thales of Miletus around 600 BC, charge (or electricity) could be accumulated by rubbing fur on various substances, such as amber. The Greeks noted that the charged amber buttons could attract light objects such as hair. They also noted that if they rubbed the amber for long enough, they could even get a spark to jump.

Amber can be used to make electricity.... who knew? \@shurgs@/
But I dig that little fact-toid, so I share it. :)


Last but not least...
MAW SIT SIT. I love the name of these stones. The black drops are Onyx, but the wonderful little green ones are called Maw Sit Sit and I love them for the name alone... and then yes, they're most beautiful also. Very similar look to Malachite... sick expensive... at least when I bought them. I hope not so today.

the whole strand of beads are 3 to 6mm beads. The ones that I WANTED that were two strands of 8 and 10 mm beads was... well, a four figure number to the left of the zeros... so I went 'cheap' and got a lovely small strand of them instead. Who has $3400 for a few stands of beads??? I'm convinced it was a typo on their site... but don't know for sure. Was long ago that I bought these and if I can find them again for something reasonable, I'll look to shop for more. Sometimes stones get expensive for a minute because they become popular. Sometimes it's because they're rare. These are more on the rare side.

They are similar in look to Malachite, but are a bit 'glossy-er'. Not for buffing, but there's a deeper or more 'neon' glow or something to the green. I'm not sure the image does them justice. Look em' up... you might enjoy them. If I have some time, I'll add some links here soon.
Mean while - I don't have time just now :)
I have to tend to me store else I make no money to shop for beads with!
Huggles you.
Til next time.
xo

Distractions...
I put this here because I KNOW you can tell how large he is by the count of bins he covers...
My Beast KC (Kitty Cat) in the formal. ;) ~click for a lifesize image... lol. And then there's some tail that you can't even see still! 22lbs of 'I rule the house'...
MAW SIT SIT:
Okay, I'm back... here are a few great reads on Maw Sit Sit...
http://gemologyonline.com/mawsitsit.html
http://www.nordskip.com/mawsitsit.html
http://www.penoir.com/stones/MawSit.html

Here's a quick clip:
Maw-sit-sit is an aggregate of numerous minerals found in the famous jade mining region of Tawmaw in the Himalayan foothills of northwestern Burma. The six main components are:
Chromite, ureyite, chrome-jadeite, symplektite, chrome amphibole, and a matrix of lighter minerals. This material is opaque to translucent with flowing veins of green and black. The matrix is dark green to black in color. Veins that are emerald green to intense neon green have occurred. http://gemologyonline.com/mawsitsit.html

Polymer Clay Incense Holder, Dragons and Amethyst

Would you like a cup of tea? I think we should call the rest of this weekend an indoor, movie, cozy wire wrapping jewelry weekend. One of my favorite things is to stay cozy in slippers during a cold weekend, put some great movies or music into the DVD and make pretty things. I love these mornings also because the weekends are my given time to 'blog, bend, play, post, communicate'... etc. All those things we love to do.

Saw the family for ThanksGiving and ate like a horse. Two plates, twice the size of me ended with a helping of the Cherry pie too.... makes for no eating at all yesterday. Dad cooked an outstanding turkey, Geo made outstanding, all the rest of the food. ;) and all the brothers, uncles and related kids were there. Fun to watch them... they grow like weeds. I love my family. :)

Dad took up the carpet and found perfect hardwood floors under it. So that was fun for him to show off too - the house looks great! They're off up the mountain next weekend to cut our Xmas trees. I like natural fresh trees during the holiday... nothing wrong with farmed or artificial either but I dig the smell in the house. mmmm....

Anyway... So yesterday I hung out with just me and gave my numbers the day. Made charts, read up on this thing called the Electro Magnetic Coupling Constant and something else on Notable Properties of Numbers... saw some friends for holiday hugs and kisses and then overfed the animals since it's an eating kind of holiday. :) We're all enjoying.... besides, they were making fun of me again. I busted them mid-mischievous tho, so they get no more turkey. You can witness the whole thing here...
http://13cattails.blogspot.com/

Those little dragons, I made a while ago and have given them all away but for the couple I kept for ME. They're super easy to make and so I think they might be a Sunday project or something I save for next week. These are great fun, very easy and here's all you need to do:

Make a 6 inch weeny rope of clay, one side narrowed to a point. Get the lump of clay into a nice round ball and then begin to roll it out with your hands.

Use the end of a small straw to poke crescents into your roll of clay. Try to alternate them like you would lay bricks. This makes them appear more 'scale-ish'. lol.

Use the end of a small paint brush and stick it up the nose to make nose holes. :)
Gently push a couple of hematite beads into the eye sockets. For these, I used 5mm beads.
Add some other beads as decorations around the head if you like. Be creative with seed beads, 1mm silver or gold beads, use wire wrapped beads or coils.... You can add more clay for 'ears', lumps, wings, legs, what ever you imagine your dragon to be.

Coil the tail end in a creative way as a 'pose' and cook your creation in 275 degree oven for about 40 minutes. Polymer clay cooks through 1/4 inch in about 15 or 20 minutes, so because these are thicker then that, I added an additional 20 minutes. If the clay isn't fully cooked, it can be weak and brittle. After a thorough baking, the clay becomes a very hard and durable plastic. You can sand, paint, spray with a glossy or matte finish....

The tail needs to either be coiled to hold the incense stick so remember this when creating the pose for your little dragon. You can optionally put a lump of clay as a 'rock' base and poke holes appropriate for the sticks. I did this in a few of them and it provides you the place to add more wire and/or beads, small twigs or moss... many things.

I added some amethyst stones on a few of them and just love the look. I used rough Aquamarine on a few, rough Kyanite (which was really cool) on one I kept and a few have various quartz crystals.

Have fun! I'll post new images when I get some more made.
Click that image for a super close up so you can get details. After they're cooked and hardened, I spray some with a matte finish. I tried glossy but I'm not sure I like it as much as the matte. Both are fun for variety and everyone loved them.

Well ladies and gents, I'm off to be with my morning coffee and wake up reading. Hope you all have a wonderful weekend.

((((Squeeeeeze)))) my big mushy hug to you. I'm gone to the bead table!
xo

Charoite Sterling Silver Wire Wrapped Earrings


I love this detailed wire wrapping but wow does it take time. I'm using 26 gauge square wire here for the wrap rather than round wire and I'm finding that I enjoy using the square wire more. I think I have more control over the bands and they lay flatter... personal pref on that, but for those new to wire, you'll discover that round wire is great for some applications and square wire for others. There are various gauges and colors and metal types to choose from and you will soon come to find your preferences of wire for the various projects you make. I like to use 18g round wire as frame wire. I normally hammer the wire frame to add strength and I like to use 26g as the banding wire and like I said earlier, the wire used here is square. The silver accent beads are 1mm sterling silver as are the earring hooks.

Tiny wires, many hours... These are deceptive in their simplicity for they took a very long time. I found that when wrapping the frames, it was easier for me to make a few wraps, then take my flat nose pliers and do just a quick 'tap' to make sure they stayed flat and tight.

The center stones are Russian Charoite and the color is natural. Can you believe??? I love this rock and have made many wonderful pieces using it.

Click the image to enlarge and get a close look. The tops of the frames are wrapped in a 'cap' style because I felt it gave a nice look and also provides a place to tuck in the back wires neatly.
When building your jewelry, I always like to advise that you give some visualization to how you might 'finish' ends or where you are going to tuck the ends of wire. If you are working from a tutorial, then this becomes less important and you can make note of how the tutorial finishes the ends. But when making pieces of our own design, I sometimes forget to give thought to this because my eyes are so full the bead candy that I didn't normally give much thought to the finish. Over time, I've learned that it's just as important as the focal point. I've been training myself to think of the findings as part of the whole design and it's become much more now then to just 'add a hook'. I've found that I enjoy creating new ways to close up my pieces and I really like challenging myself to find 'neat' ways to tuck away the wire. It adds a stamp of quality to your project and your piece of wire jewelry, when you or your customer can wear it, without feeling the 'scratch' of a loose end!

Wire Wrapping Tutorial: Beginner: How to Make Beaded and Crystal Wire Hair Spirals


This one is really fun and very easy to do. They are completely decorative so don't expect them to actually hold any hair. These add decoration to the hair, a little sparkle, a little pearl, a little crystal... great for party hair or wedding hair or just fun to make with the girls. You wear them by 'twisting' them into a lock of hair. This is an amazing look to decorate an 'up'-do for a wedding or night out. These are small, so you wear several of them, strategically placed for desired hair blinging. Great to sparkle up braids also.  Enjoy!

It's a basic, very wide spiral, using a thick gauge wire and adding some fun beads. Click the images to enlarge.


You Need:
1. Round nose pliers
2. Flat nose
3. File
4. Cutters
5. 4 inch long, round, 18 gauge, soft wire. (hard is fine too)
***You'll need one wire per each of these you want to make.
6. 1 foot of 26g, sterling, round, soft wire.
7. 1 foot of 28g, sterling, round, soft wire.
8. A bunch of small, fave beads, 3 to 5mm.


1. After you cut your wires, be sure to file the ends to get the rough edges off.

2. Then using your round nose plier, create a loop at one end.


Preview: You can create the spiral first and then attach the beads, or you can leave the wire straight and create the spiral as you go. Take a look at the images ahead and get an idea of what will work best for your design.

In this project, I am coiling around the gold, so this for me, is easier to do before I spiral the gold.


4. After creating the first loop, anchor a 6mm Swarovski crystal (or your fave bead) to it using the 26g silver wire.

For something that's going to be in hair, something that catches the light and gives a little sparkle is nice. Wrapping the gold fill wire with silver adds to this also.

5. To anchor the bead: Make a bend in your 26g sterling wire, one inch from the end, bringing the short end together with the long end. Thread the entire wire through the center of the bead. The loop made by the wires coming together will form a 'kink' at the end of the bead and keep it from passing through. Anchor it to the gold loop by wrapping with the short end of the silver wire.

6. Using the long end of the wire, coil around the gold in a consistent and even wrap. Stay close and tight to the gold and coil until you are about 2 inches from the other end. Make sure to tap the end of the silver wrap with a flat nose so that it's not sticking out. Taking a minute to tuck the ends in, makes always for a nicer project.


7. Using the 28g sterling wire now, anchor it to gold loop under your bead. Make a couple of tight wraps and then add a 1mm silver bead. Make a couple of tight wraps, moving 'forward' and add another bead. Work like this until you add as many as you like. In this case, I added 11 of the 1mm sterling beads.


8. Thread a 4mm crystal bead and begin to move in the opposite direction, back toward the spiral center. Add another 4mm crystal, wrapping around the main wire to anchor each time.

9. Add a couple of pearls or some other silver beads or some seed beads... have fun with it.


10. I added two small freshwater pears and then finished it up by anchoring the end of the wrap wire under the main center bead. Neat and clean.

11. Take your round nose and create a loop at the unfinished end of the wire. Gently 'pull' and create a spiral by moving around the center cluster. Adjust with your hands until you get a neat spiral.

12. Push the bead cluster forward just slightly from the end. The next image shows the finished project.

That's it... Twist into a lock of hair and be beautiful. :) Make many of these in fun ways using many types of wire and beads. I used gold and silver but you can use craft wires and copper for more casual hair wear.

Enjoy! Thanks for visiting here.