Learning to Weave Wire - A Twisted Serpent

This isn't finished yet and I have a wonderful story to go with it... but wanted to share the progress as of today.  I built the frame and used the weave I spoke of in the first post... a simple looping action but rather than a one to one loop, I used three and two.

Please remember that what I'm showing are weaving techniques as I create pieces and learn.  These are not full blown project tutorials, but I do hope you can use the information to inspire your own creative projects!

1.  Anchor your weaving wire (26 or 28 gauge is best) by creating three single loops around the outside frame wire.

2.  Loops four and five should cross both frame wires and then do three more single loops around the outside wire.

3.  Repeat this pattern all around your frame wires.  You can, like I did, choose a logical and attractive point to break the weaving pattern and do simple coiling around both frame wires, then continue the weave pattern.

You will notice that I'm actually using three frame wires here... I add the third wire into the weaving pattern in the middle section of my Serpent. ;)

In this section, I stop the three to two loop pattern and move to a one loop pattern over each of the three wires.

1.  Starting at the inside frame wire, anchor the weaving wire by creating three single loops, moving the wire to the right.

2.  Cross the center frame wire and weave down, between the center frame wire and the right side frame wire.  Bring the 26g back up between the first and center frame wires, completely encircling the center frame wire.

3.  Bring the weaving wire across the right side frame wire and make a complete loop around the outside frame wire.  Bring it under and back up between the first and center frame wire, then down between the center and right side, to completely encircle the center frame wire.

4.  Bring the weaving wire under and up the outside of the first frame wire.
Repeat this pattern as far up your piece as you desire, when using three frame wires.

This is what it looks like so far.  I haven't anchored the focal bead yet, but have it positioned for a visual inspection on my pendant.  Here's a peak at the whole thing... remember, it isn't finished!  So I hope you come back to see where this goes.

Enjoy your wire craft and have a beautiful day!

Learning to Weave Wire - A Twisted Heart


Okay so this is the latest project of mine... learning this technique
takes time but is full of joy!  I hope to inspire you to give wire weaving a try.  My next post will be out soon with some details but until then... enjoy the eye candy ;)

Learning to Weave Jewelry Wire - Basic 1 to 1 loop and coils

Continuing with the previous project, I wanted to show you what the same weave looks like but this time, it's basically a 1 to 1 loop around the frame wires.  This is also nice if you are making a track of sorts or a 'cradle' to wrap around the edge of a focal bead.

I'll be back to show more soon ;)
Click the image to enlarge and get a close look.


Learning to Wire Weaving - A Basic 2 to 1 Loop

One of the first things I learned when weaving wire is... make your frame bends first if you are using a larger wire.  After the wires are weaved, they can become very difficult to bend, especially if they require a twist or sharp curve around your focal bead.  Maybe others know a better way of doing this, but for me, this seems to be the first step in a project.

In this photo, I've spiraled around a focal glass bead with 16 gauge wire and I'm using a 26g wire for the looping or 'weave'.

1.  I've anchored the thin wire at the beginning of the frame by doing a simple looping wrap over both frame wires.

2.  Where the frame wires begin to separate, loop twice around the 'outside' frame wire, then come over both frame wires, down the inside frame along the side that faces the bead.

3.  Come back up through the middle and loop once around the 'inside' frame wire, then under both frame wires, returning to the outside of the frame.

The looping is always going in the same direction and this motion is repeated all around the focal bead.

I do two loops around the outside wire and one loop around the inside wire because these wires are spiraled around the bead and this seems to create a nice uniform pattern, keeping the loops even with each other as I move around the frame wires.

It's an easy first weave to practice.  As I wrote in the previous post, it's very important to work with a comfortable length of wire for the weaving.  I use three feet at a time.  Work slowly and carefully, managing the thin wire so that it does not kink or bulk while looping around the frame wires.  Make sure the loops are snug and laying flat along the frame.

After you do three or four 'rows' of loops, you might use your thumb and finger to push the loops close together to keep them uniform and neat.

You can click each of these images to enlarge them and take a better look.  Have fun!  I'll be back with another post soon.

Learning to Weave Wire

This can be one of the most unique and beautiful wire techniques, however it can also be the most frustrating and tedious to learn... there is no getting around the fact that it takes practice and a whole lot of patience.  I've been working on learning it for a few months now and learning how to keep the wire neat, tight and attractive... many sighs and in one case, tears, later, I think I'm finally starting to understand what it takes.

I want to share what I learn with you to help get you over the very frustrating starting points.  It looks a lot easier than it is and so I give huge credit to those artists who seem to do magic with these techniques, they truly have learned and applied a worthy skill of wire craft.  There certainly are many others who have opinion on how 'best' to do these techniques so I encourage you to explore and read as the things I'm covering with you are from my own personal experience, there may be better ways... please share via comment if  you'd like as I'm also, still learning.

Beginning Tips:
1.  Use a small gauge wire to do the weaving, 26g and 28g is what I use.  Use a larger, more sturdy wire for the frame of your piece.

2.  Use a manageable length, I use 3 to 5 feet at a time.  I don't hold my wire coiled up like I've read in other places.  I use the wire length loose, like a thread.  Weaving with more than 3 to 5 feet at a time becomes difficult to manage and the wire hardens as you weave, so a longer length, I've found, causes kinking and breaking along with just being hard to handle.  Working with one foot of wire at a time, will get you no where fast... a foot of 26g wire, weaved around 16g seems to create approximately 1/2 inch of weaved work.  Three feet of 26g wire seems to create just over an inch to 1.5 inch at a time of weaved work, depending on the size of the frame wires and the pattern of your weave.

3.  If you work with your weaving wire loose like I do, be careful of your eyes, the wire can still be a bit difficult to handle when you are first beginning and I've come close to poking myself in the face.  Either use eye wear or just always be mindful of that loose end.

4.  Keep the weaving wire working in the direction of it's natural bend (as it came off the spool).  Normally I take a 3 foot length of wire and gently 'straighten it' by pressing it between my fingers.  Coming off the spool, it has a natural loose coil already on it and I find this hard to work with, so I take the moment to press it into a straight piece of wire.

5.  Keep a controlled but slight tension on the weaving wire as you work.  Push it snug to the frame wire and use your flat nose pliers when the wire becomes short and hard to push or pull tight.  Don't continually 'rub' your wire straight as this will cause hardening, making it brittle.

6.  Work slowly and neatly, ensuring that the weaved loop does not overlap the previous one... this is the hard to do part, but keeping patient and making sure each wrap is snug and flat against the frame wire will make for a better and more beautiful piece when done.  This will be effort anyway, so make it worth it.  There is no 'fast way' to do this technique, so prepare yourself, before you begin and make sure you work in good lighting.

7.  Pay attention to your weave, what direction you are working in and what count of loop you're on... this will matter because eventually, you will 'end' one length of wire and have to 'begin' a new length of wire to get through the distance of your frame.  Learning to keep focus will keep your weave uniform.

8.  When working with a frame that has angles or joins, it is best to start your weave at the most narrow point of the frame and work into the wider spaces.

I hope this helps for now and I hope you continue to return and read as I intend to post a few more articles about wire weaving and how to learn this beautiful technique.  I will also be showing a few different weaving patterns and some simple projects that you can try.

New! Blue Ice Wire Wrap Cuff Bracelet Tutorial

I had a wonderful time creating this... it just took MUCH longer than I thought it would, but I hope it's worth the wait.  I like to use regular craft store items for these projects for several reasons, one being that you can easily find the exact items needed to complete the tutorial project and they are within reasonable dollars.  No fear of purchasing precious metals or finding rare and exotic beads, just run to the local hobby / craft store and get started!

This is a whimsical and fun wire wrapped cuff, designed so you don't have to worry about technical abilities. While it takes some time, the wrapping techniques used are simple and can be accomplished with minimal skill... only a will to continue and not give it up. ;)

Click here to purchase the tutorial.


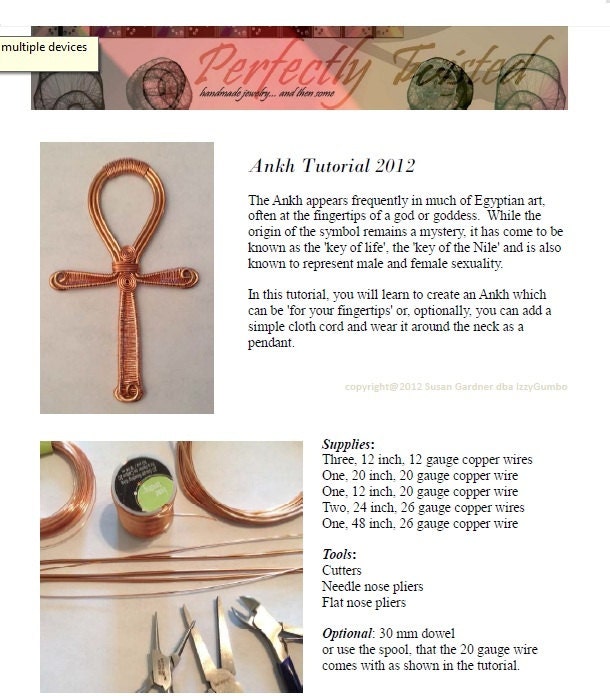
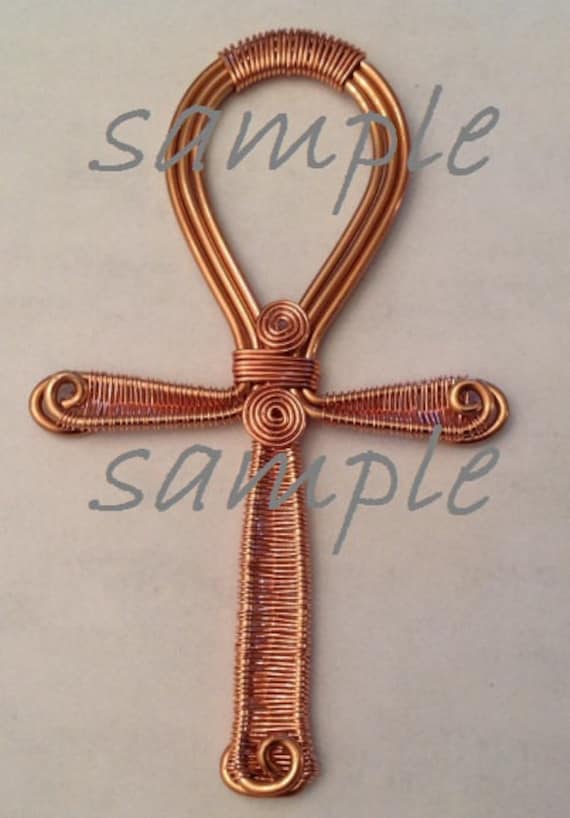
New! Wire Wrapped Copper Jewelry, Ankh 2012 Tutorial

The Ankh appears frequently in much of Egyptian art, often at the fingertips of a god or goddess. While the origin of the symbol remains a mystery, it has come to be known as the 'key of life', the 'key of the Nile' and is also known to represent male and female sexuality. In this tutorial, you will learn to create an Ankh which can be 'for your fingertips' or, optionally, you can add a
simple cloth cord and wear it around the neck as a pendant.

Newly listed! In my etsy store... 
come shop, your hearts out. ;) 

wow!

wow! have I been away...
the past eleven months have been "life changing" yet again... and wonderful, all the same.
I appreciate to return and see you here.  Many hugs!
.
have I mentioned my friend...
http://www.colortools.com/
Personal color analysis is the easiest and fastest way to look younger, slimmer, and memorable! "
We can all gain from that!  Read a bit of her blog... do the fave thing and think about how important it really is also, to our coordination of jewelry, beads, fashion and life styles....

"Colors in a person's environment can have a dramatic effect on his or her mood state. While people often associate mood-related color theory with New Age belief systems such as chakras, many psychologists have reported that mere exposure to color can alter not only mood, but also performances on specific tasks such as exams. One study showed that exposing subjects to the color red negatively affected performance on exams...."  Read More, Click Here

New! Tutorial, Antique Copper Earrings

Just in time for holiday creating!  Use fun beads and bright color in the wires
for a unique and easy to make holiday gift.  The 'how to' on the long and decorative hooks
is included and I hope will spark wonderful new ideas to enhance the look of your earrings.
I hope you like ;) xo
Come visit the shop for more tutorials!
Thank you! Izzyzgumbo@gmail.com

Origami Sisters 2

hey you... Creative One, I'm making cards today :))

greetings...


Some ideas I hope you'll enjoy. Easy to make... okay maybe not toooo easy but fun!
Scrapbook and origami papers.  I make these up as I go, so there are no patterns, but with the origami paper, it's easy to imagine what 'hip' kimono might look like. ;)  I love making these.

For the card body, I used 12 x 12 Tex Tureo Cardstock, which you can purchase at any local hobby store.  This stack is called Far East and I got the from Michael's, the stickers too.  A bit of imagination makes for a unique gift and a great time of it!  Enjoy and have fun!

Remember these?  From my previous post ... Sisters Origami

click to enlarge

Simplicity

”... I’m a carefully calculated and well centered,
yet chaotically constructed complication called, Simplicity…”


hi.Q.can you see me?


updated;
it still applies

Paper & Copper Earrings

Some other fun and inexpensive ways to create and be creative ;) Have I shown you these? Again, simple craft papers, creatively cut, glued into place, wrapped in shiny copper wires and finished with copper ear hooks. Many of these papers are from book marks I created once before and they make wonderful gifts.... there are NOT enough hours in a day and don't even ask, but I also research into why that is! ;)

Who needs a garage...


Please  note:  my new email address
izzyzgumbo@gmail.com

The making of a 'studio' ;)

umm... yeah, I do jewelry in here too lol!
Enjoy some older articles I've written on building a creative space...
Health and Posture at the Jewelry Table
Your Jewelry Workspace
Tools for Making Wire Wrapped Jewelry

Well I sure hope you have the space already cleared in your garage before you get started... I had so much stuff crammed into mine, I had to clear it out first!  Anyway, after that.... I had a great time doing the rest!

FUN! ideas are these...
1.  Clear the floor of crap and carpet or other funky garage floor coverings and try to find foundation... mine is cement and was there after the removal of an old carpet left from previous occupants.
2.  Battleship grey is an awesome color to pour out onto a cleanly swept cement foundation and with roller on a broomstick handle, smearing such quick dry paint all over the floor is another delightful experience!
3.  Sweep away nasty cobb webs and corners, don't look, don't think, just do ... and using large sunglasses or eye cover is a must!  Sweep the ceiling without this eye protection and risk the idea of an icky spider filled something falling onto your face.... don't say I didn't warn you :) If you have a vac with hose, it's best.
and....
don't take yourself ... "SO SiriuSly!"  (my painting above)... it's an ART STUDIO and will be a mess most of the time anyway.  Have fun!

For the walls and my eccentric personality, I chose to use black chalk board paint and painted much of the wall spaces with it.  Including a few seats and counter surfaces.... some old picture frames too for portable chalk board space and this wonderful stuff comes not only in black but also GREEN!  And who can have an 'art studio' without whimsy things drawn all over the new chalk board walls. :))  what fun you will have... indescribable.

A few more...

While I could have purchased hooks in the same color of wire and saved myself the time, I decided that I wanted a longer and more rustic finding, so I simply made them myself. Take a desired length of wire, create a small end loop, bend the wire softly over your pinkie finger to create a soft curve and use flat nose pliers to create a small bend at the end of the wire.

If your cut is not super clean, use a small jewelry file to clean off the wire... one or two times across a nail file will help smooth out the end as well and make putting the earrings on, more comfortable. Dare to use the unique and more rare stones, crystals and handcrafted beads even. ;)

I've got some new tutorials coming out soon... so keep checking back!
Izzyzgumbo@gmail.com

A few things


I've been up to them... ;)

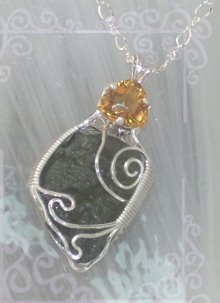
Using the fun and very inexpensive craft wires, you can create wonderful and abundant pieces to enjoy, share and even sell, without the fear of a breaking pocket book.  I began with gold fill and silver wire but as I've moved forward, I've discovered the joy and freedom  in using the colored coppers.  I still use real and quality stones in the designs but had a great time toning down the 'dress'... more rustic and natural in antique and brass colored Parawire, which you can find at any online or local hobby store such as Michael's and Hobby Lobby.  The stones are of Kyanite, Carnelian, Chalcedony, Moldavite, Charoite and Turquoise :) click the images for a bigger view

I hope my images inspire you to create and have a great time with it!
Please note my new email address
izzyzgumbo@gmail.com

new contact!!!


PLEASE change the contact info if you're trying to email me, my new is
izzyzgumbo@gmail.com

Many smiles, inspire something and be inspired!

~ enjoy your rocks! ;)
LOVE... your creative Nature.

Origami Note Cards


After a few days of making these wonderful little dolls, I decided to set them onto card stock and create unique note cards. They have three blank pages each inside along with a beautiful sheer envelope. Each card and Origami Geisha are created one at a time and each are one of a kind.
So that they don't get 'handled too much', I created simple packaging out of paper and some cute bee stickers. The cards can easily be seen but are also protected until purchase.

I've enjoyed them and hope they give you some creative ideas!
Many smiles and much love.

Sisters Origami


I Sa Ya...

I spent the last two days making the Ladies and also some kiddie bookmarks for the shop. I hope you enjoy the ideas and I hope they inspire some fun times! These are wonderful and easy to make. The Kimono patterns are my own so probably not 'traditional' but I love them anyway. :))

Hugs! Wonderful days and bright smiles!


Hairsticks for Spring!


The tutorial is now in my store! Click here to shop.

An easy and fun project using simple materials which can be found at any local or online craft store! I used simple wooden hair sticks that are six inches in length, beading glue, copper wire and some of my favorite seed beads. I strung the beads along thin copper wire and then using beading glue, attached them onto the hair sticks. I've sold quite a few of these at work and certainly I use them! They're beautiful, fun, easy to wear and very secure in holding up the hair.

If you've never worn them, it's easy. Wrap your hair into a bun, stick a stick through and use more then one! :)) I hope you enjoy the ideas!
Hugs and many creative days!

Altitude Adjustment...

"What I do all day works..."
works much better than
"what i do all day is work".

:) Welcome to Spring!

FREE! Earring Hanger, Display, GemA.Tree Tutorial


Well it's not like I've not been doing anything! :)) I created this small, fun and easy tutorial which I hope you'll enjoy! I've made many of these as gifts and just as a place to put my earrings. They're fun and the materials can be found in any craft store. Use your spare large wooden beads, large glass bobbles, mosaic tiles and crystals to create a variety of whimsy designs.

The file is a .pdf file and can be downloaded from my FREE TUTORIAL PROJECTS page

Have fun! Suggestions and comments are always welcome on my tutorials. I appreciate your eyes, your friendship and your time!

New! Wire Wrap Pendant Tutorials, In Time for Holidays!


Hi everyone! Hope your holidays have been as wonderful and (as busy??) as mine have been :) It's been a while since I've wrapped with gold fill wire but it was such a pleasure to get my hands on it again. This amazing Pietersite cabochon, I've had a while and went back and forth with wire choice thinking that perhaps I'd try it in this or that, but in the end, it is easy to see why the color of gold suits this lovely stone. It's warm colors of rich browns, chocolates, golds and reds look delicious and rich inside of gold.

My Tear Drop pendant tutorial was just finished today so I hope you enjoy that as well! It's in the shop too!

My new tutorials can be purchased at my Etsy shop! I so hope you're tempted :)
Many smiles, much love to you and yours for the holiday and best wishes for the New Year!!!
2010... it's a good one. ;)
x